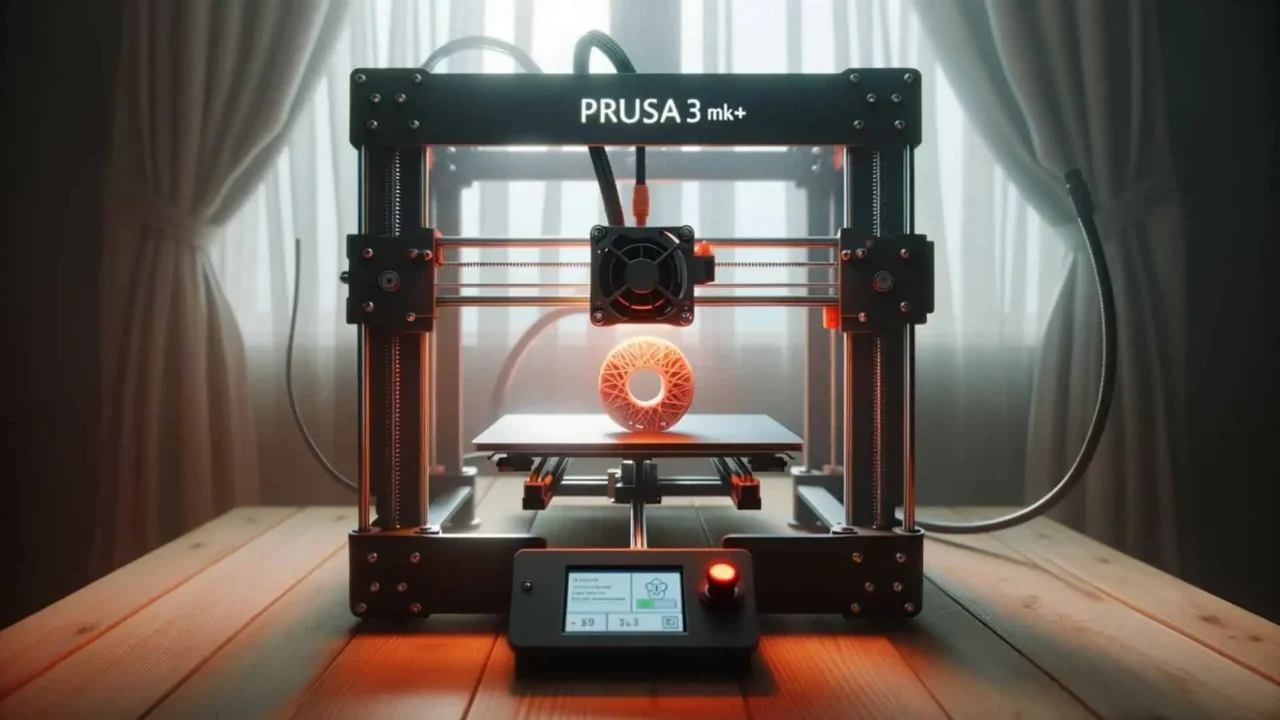
Original Prusa i3 MK3S+ 3D Printer Specifications, Build Volume and Review
Prusa Research is a well-known company in the 3D printing world, founded by Josef Prusa, the creator of the popular open-source Prusa i3 design. The company produces high-quality 3D printers, filaments, and software, and has a loyal fan base and a supportive community.
The Prusa i3 MK3S+ 3D Printer is the latest iteration of their flagship 3D printer, which has won many awards and accolades for its performance, reliability, and features. In this review, we will take a closer look at the Prusa i3 MK3S+ and see what makes it one of the best 3D printers under $1000.
Disclaimer: This post contains affiliate links, which means that if you click on any links and make a purchase, we’ll get a small commission, at no cost to you.
Looking to buy a 3D printer? Consider reading: Best Resin 3D Printers for Beginners and Miniatures.
Specifications Prusa i3 MK3S+ 3D Printer
Prusa i3 MK3S+ 3D Printer uses the FFF method. That’s where the printer melts a filament (like plastic) and lays it down layer by layer to create your object.
The Basics of Prusa i3 MK3S+ 3D Printer:
- Extruder: Direct drive type with one nozzle.
- Size for Printing: You have a space of 9.84 x 8.3 x 8.3 inches. It’s not the biggest out there, but it’ll handle most of your projects just fine.
- Materials: This printer isn’t picky! It can use a bunch of different filaments like PLA, ABS, PETG, and even flexible ones like TPU. Its heated bed and all-metal hotend make that possible.
- Detail Quality: With a layer height as tiny as 50 microns, this printer can capture really fine details. So, your prints will have a smooth finish.
- Connecting: You can send your designs to the printer through an SD card, a USB cable, or use OctoPrint to connect it to your network, either with a cable or Wi-Fi.
If you’re looking for a solid 3D printer that balances features, quality, and cost, the Prusa i3 MK3S+ is a strong contender.
Prusa i3 MK3S+ 3D Printer Unboxing and Assembly
The Prusa i3 MK3S+ 3D Printer comes in two options: fully assembled or DIY kit.
Prusa i3 MK3S+ Ready to Go: Fully Assembled
- Cost: $999 (at the time of the article written)
- What’s the Deal? Simply unbox, set it up, and you’re ready to start printing.
- Best For: Those who want a hassle-free start, aren’t too keen on assembling things themselves, or just want to dive straight into 3D printing.
Prusa i3 MK3S+ DIY Adventure: The Kit
- Cost: $749 (a decent saving!)
- What’s in the Box? All the parts you need, the tools to put it all together, a step-by-step manual, and access to online how-to videos.
- Time Commitment: Prepare to set aside 4 to 8 hours. The duration depends on your handiness and familiarity with 3D printers.
- Best For: Hands-on folks, DIY enthusiasts, or anyone curious about the nuts and bolts of their printer. It’s also a great learning experience, helping you understand the inner workings of your machine.
In Short: Picking between the assembled or DIY kit really comes down to your preference. If you love building things and saving some cash, the kit’s a fun project. But if you’re eager to start printing without delay, the pre-assembled version’s your best bet.
Prusa i3 MK3S+ 3D Printer Design and Build Quality
The Prusa i3 MK3S+ has an open-frame design that consists of a sturdy metal frame with orange plastic parts. The printer has a sleek and minimalist appearance that matches its brand identity.
Prusa i3 MK3S+ Look & Feel
- Design: Open-frame structure with a combo of metal frame and vibrant orange plastic components, giving it a distinctive Prusa look.
- Appearance: Sleek and minimalist, true to the brand’s identity.
- Build Platform: Features a magnetic spring steel sheet with a PEI surface. This is a big win because you can just bend it slightly, and your print pops right off. No more scraping or tools needed!
Prusa i3 MK3S+ User Interaction
- LCD Screen & Knob: Positioned at the front, making it easy for users to navigate through menus or tweak settings.
- Connectivity: SD card slot conveniently located to the left of the screen; USB port on the right side for easy access.
Key Features of Prusa i3 MK3S+ 3D Printer
- SuperPINDA Probe: Upgraded from the earlier models, this new probe adjusts for temperature changes. What does that mean for you? Faster, more precise bed leveling.
- Bondtech Gears: These dual gears in the extruder give your filament a firm grip, ensuring smooth and consistent feeding.
- Noctua Fan: This fan isn’t just any fan. It’s known for being super quiet while keeping the hotend cool. A quiet workspace is always a plus!
- Power Panic: Everyone’s worst 3D printing nightmare: a power outage mid-print. With Power Panic, if the power goes out, you won’t lose your progress. The printer resumes right where it left off.
- Filament Sensor: Run out of filament? Got a jam? No worries! The printer will pause and alert you, waiting for a filament change.
Durability & Quality Prusa’s reputation for quality shines through in the MK3S+. Made with top-notch materials, this printer promises both durability and consistent performance.
In a Nutshell: The Prusa i3 MK3S+ is a well-thought-out piece of machinery. From its aesthetic appeal to its impressive range of features, it’s evident that every design decision was made with the user’s experience in mind. Whether you’re a beginner or a seasoned 3D printing enthusiast, this printer is built to deliver.
Prusa i3 MK3S+ 3D Printer Setup and Calibration
For those who are new to 3D printing or are transitioning from a different 3D printer, the setup and calibration phase is crucial. Thankfully, with the Prusa i3 MK3S+, this phase is streamlined and user-friendly. Here’s a breakdown of the initial setup process:
1. Unboxing and Checking Components:
- Once you open the box, take out the printer (if you have the assembled version) and place it on a flat, stable surface.
- Make sure you’ve received all the necessary components, such as the power cord, SD card, and the spool of Prusament PLA filament.
2. Loading Filament:
- Heat up the extruder. Use the LCD menu to select the filament type you’re loading so the printer can adjust to the correct temperature.
- Insert the filament into the extruder inlet, gently pushing until it reaches the hotend.
- Navigate to the ‘Load Filament’ option on the LCD menu. Confirm when the filament starts extruding. You should see a consistent flow of filament out of the nozzle.
3. Bed Leveling & Z-offset Calibration:
- The Prusa i3 MK3S+ employs an automated mesh bed leveling process using the SuperPINDA probe, but you still need to calibrate the Z-offset to get the perfect first layer.
- Navigate to ‘Calibration’ and then ‘First Layer Calibration’ on the LCD menu.
- The printer will guide you with on-screen instructions to fine-tune the distance between the nozzle and the bed, ensuring the first layer adheres well and has the desired thickness.
4. Slicing Software Setup:
- PrusaSlicer: A powerful, yet user-friendly slicing software tailored for Prusa printers.Installation: You can download it from Prusa’s official website and install it on your computer.Model Import: Once installed, open PrusaSlicer, and drag and drop your 3D model onto the build plate.Setting Configuration: Choose from preset print profiles based on your desired quality and filament type or fine-tune settings manually.G-code Generation: Once satisfied, slice the model, and export the G-code. Transfer this to your printer via SD card or USB drive.
5. Printing Your First Model:
- Insert the SD card or USB drive into the printer.
- Navigate the menu to select the G-code file of your model.
- Watch as your model starts to come to life!
Tips for Best Results:
- Ensure your build plate is clean for optimal first-layer adhesion. A clean surface ensures the filament sticks well and reduces chances of warping.
- While PrusaSlicer offers excellent profiles out-of-the-box, don’t be afraid to experiment and customize settings based on your specific needs and model intricacies.
- Regularly check for firmware updates for your printer. Prusa frequently releases updates to enhance printer performance and add new features.
Conclusion: The Prusa i3 MK3S+ boasts of a user-centric design, ensuring even beginners can set up, calibrate, and start printing with ease. With its comprehensive manual, optimized software, and intuitive interface, you’re well-equipped to dive into the world of 3D printing.
Prusa i3 MK3S+ 3D Printer Software
PrusaSlicer has evolved to be one of the most trusted slicing software tools in the 3D printing community, especially for users of Prusa printers. But its capabilities extend beyond just Prusa machines; it’s versatile and caters to a variety of printer models.
Features and Advantages:
1. User-Friendly Interface: The clean, organized interface of PrusaSlicer makes it accessible for both beginners and experienced users. It presents essential functions in a straightforward manner and more advanced settings just a click away.
2. Comprehensive Presets: The built-in presets cover a broad spectrum of requirements:
- Printer profiles: Different Prusa printer models and even some non-Prusa machines.
- Material profiles: From standard PLAs and ABS to more specialized filaments.
- Print quality: Ranging from draft to high-detail.
3. Advanced Support Generation:
- Auto-generated supports: The software smartly identifies overhangs and places supports accordingly.
- Paint-on supports: A unique feature where users can manually dictate where supports should and shouldn’t be, giving unparalleled control over the print process.
4. Adaptive and Variable Layer Heights: These features allow for optimizing print quality and speed:
- Adaptive layer height: The software adjusts layer heights in parts of the model where detail is crucial, providing fine details without increasing print time significantly.
- Variable layer height: Users have manual control over layer heights at different parts of the model, ensuring flexibility in optimizing for detail or speed.
5. Seamless Integration with Other Software: PrusaSlicer smoothly interfaces with various 3D modeling software tools. Its ability to import a diverse range of file types means users can transition from design to slicing without hassle.
6. Multi-material Printing: For printers that support multi-material/multi-color printing, PrusaSlicer offers easy setups and configurations to design prints with multiple colors or even materials in a single print job.
7. Real-time Preview: After slicing, users can preview the entire print layer-by-layer. This visualization aids in detecting potential problems or areas of concern before the print starts.
8. Continuous Updates: Being actively developed, PrusaSlicer often rolls out updates with new features, improvements, and bug fixes. The Prusa research and development team are also responsive to community feedback.
Conclusion: PrusaSlicer stands out in the vast sea of slicing software options due to its blend of beginner-friendly interfaces and advanced features. It’s evident that a lot of thought and expertise have been poured into its development, making it an excellent choice for 3D printing enthusiasts of all levels.
Prusa i3 MK3S+ 3D Printer Printing Performance
The Prusa i3 MK3S+ delivers excellent printing performance with different materials and settings. The printer can handle various types of filaments, such as PLA, ABS, PETG, ASA, Nylon, TPU, and more. However, some materials may require additional modifications or accessories, such as an enclosure for ABS or ASA to prevent warping and cracking. The printer also has some features that improve its printing performance, such as:
- Linear advance: A feature that compensates for the pressure build-up in the nozzle and reduces oozing and stringing.
- Skew correction: A feature that corrects for any misalignment of the axes and ensures accurate dimensions and angles.
- Silent mode: A feature that reduces the noise and vibration of the printer by lowering the acceleration and jerk settings.
The printer also has a good balance between speed and quality, as it can print fast without compromising the print quality. However, you can also adjust the speed and quality settings according to your needs and preferences.
Prusa i3 MK3S+ 3D Printer Print Quality
The Prusa i3 MK3S+ produces high-quality prints with fine details and smooth surfaces. The printer has a layer resolution of 50 microns (0.05 mm), which means it can create very thin layers that are barely visible to the naked eye. 1. Benchy:
- Details: The text details on the bottom and the rear license plate were legible, highlighting the printer’s ability to capture finer details.
- Overhangs: The boat’s bow, which has a challenging curve, printed smoothly without notable drooping.
- Bridging: The arches and the roof of the cabin demonstrated great bridging capabilities, with minimal sagging.
- Surface Quality: The sides of the Benchy were smooth, and the layer lines were almost imperceptible.
- Holes: The circular window holes and rectangular doorways had a precise shape without any significant stringing or oozing.
2. XYZ Cube:
- Dimensions: Measurements of the cube matched the intended dimensions closely, within a margin of error of around 0.1mm.
- Angles: The cube had sharp edges and consistent 90-degree angles, indicating a stable and aligned Z-axis.
- Surface Quality: The flat faces of the cube were pristine with barely noticeable layer lines.
3. Calibration Cube:
- Extrusion: The cube’s surfaces were solid and consistent, suggesting that the extrusion rate was accurate.
- Accuracy: The dimensions of the cube aligned closely with its intended size, indicating high print accuracy.
- Alignment: The X, Y, and Z markings on each face of the cube were clear and properly centered, showing good printer alignment.
4. All-in-One Test:
- Overhangs: The overhang tests ranging from 20 degrees to 70 degrees printed successfully, with minor imperfections beginning to appear at around 65 degrees.
- Bridges: Bridging tests were accomplished with high precision, with the longest bridge showing minor sagging.
- Holes: Various sized holes in the test were round and consistent.
- Details: Fine details, including raised and recessed text, were printed clearly.
- Negative Space Tolerances: The movable pins designed to test tolerances moved freely, indicating precision in the printer’s ability to manage small clearances.
Conclusion: The Prusa i3 MK3S+ demonstrated impressive print quality across various benchmark tests. The printer’s high resolution, paired with the Prusament PLA and optimized settings in PrusaSlicer, ensures that models are not only aesthetically pleasing but also dimensionally accurate. These results affirm the reputation of the Prusa i3 MK3S+ as one of the top choices for enthusiasts and professionals seeking reliable and high-quality 3D prints.
Prusa i3 MK3S+ 3D Printer Noise, Heat, and Safety
The Prusa i3 MK3S 3D Printer is pretty cool because it doesn’t make much noise. It’s as quiet as a library! This is thanks to special parts that make the machine run smoothly and a “stealth mode” for super quiet printing.
This printer has a special heated base that can get really hot, up to 120°C. This is great because it helps certain materials stick better and gives a smoother print. Plus, it’s super easy to take off your finished item because of a special coated sheet on the base.
On top of that, it’s got some awesome safety features. If there’s a power outage? No worries, it picks up where it left off when the power’s back. If you run out of the material? It’ll stop and wait for you. If there’s something blocking the way? It senses it and adjusts. And if there’s any risk of overheating or fire? It’s got protections in place. So, this printer is not just cool but also safe!
Prusa i3 MK3S+ 3D Printer Customer Support and Community
Prusa Research is awesome when it comes to helping their customers. They give you a detailed guide that shows you how to set up, use, and fix your printer. And if you ever get stuck, they’re just a call, email, or chat away. People love how quickly and kindly they respond.
Plus, there’s a big group of Prusa users online who are always chatting and sharing cool stuff. Whether you’re on forums, social media, or watching YouTube, there’s always someone talking about tips, showing off their latest designs, or sharing updates. New to 3D printing or a pro? It doesn’t matter; everyone’s super friendly and helpful!
Prusa i3 MK3S+ 3D Printer Price and Value for Money
The Prusa i3 MK3S 3D Printer is priced around $1000 if you want it ready to use, or around $750 if you’re up for some DIY assembly. Now, that might seem a bit on the expensive side for home 3D printers, but it’s packed with features that make it worth every penny. It prints beautifully, is reliable, user-friendly, super quiet, safe, and works with different software and materials. Plus, when you buy it, they toss in a roll of their top-notch Prusament filament.
Disclaimer: This post contains affiliate links, which means that if you click on any links and make a purchase, we’ll get a small commission, at no cost to you.
When you compare it with other printers, the Prusa holds its own. The LulzBot Mini 2 is more expensive at $1,500, and it can’t print as big of an object as the Prusa can. The Ultimaker S3 is a whopping $4,095 and offers a similar experience as the Prusa. And while the Creality Ender 3 Pro is much cheaper at $236, it doesn’t match up in terms of quality or reliability. So, all in all, the Prusa i3 MK3S gives you good bang for your buck!
Prusa i3 MK3S+ 3D Printer Pros and Cons
The Prusa i3 MK3S 3d Printer has many advantages and disadvantages. Here is a summary of some of them:
Prusa i3 MK3S+ 3D Printer Pros:
- Consistently high-quality prints
- No misprints in our testing
- Easy-to-use yet powerful software
- Supports multiple filament types
- Includes a 1-kilogram PLA spool
- Professionally printed user guide and great support resources
Prusa i3 MK3S+ 3D Printer Cons:
- Build volume a bit small for the price
- Monochrome interface feels outdated
Final Thoughts on Prusa i3 MK3S+ 3D Printer
The Prusa i3 MK3S 3D Printer is a great 3D printer for hobbyists and makers who want a reliable and versatile machine that can produce high-quality prints with various materials.
The Prusa i3 MK3S+ 3D Printer has many features that make it easy to use and maintain, such as the heated bed, the removable spring steel sheet, the filament sensor, the power panic, and the automatic bed leveling.
The Prusa i3 MK3S+ 3D Printer also has a low noise level, which makes it suitable for home or office use. The printer has a large and supportive online community, which provides helpful resources and feedback. The printer is a bit pricey, but it offers good value for money considering its performance and quality.
The Prusa i3 MK3S 3D Printer is a good buy for anyone who wants to get into 3D printing or upgrade their existing printer. The printer is suitable for beginners who want a hassle-free and user-friendly experience, as well as experts who want to customize and enhance their printers.
The Prusa i3 MK3S+ 3D Printer can handle various projects, from simple models to complex designs, from functional parts to artistic creations.
Follow us for the latest Tech Updates. Please like and share this article!
FAQs on Prusa i3 MK3S+ 3D Printer
Why is the Prusa MK3S so expensive?
The Prusa MK3S+ boasts a premium price due to its advanced features and robust ecosystem. Prusa Research ensures quality by producing their own hardware, software, and filament. Its reliability, community support, and constant innovation justify the investment, making it a top choice for serious 3D printing enthusiasts.
What is the difference between Prusa 3 and 3s?
The Prusa i3 MK3S is an enhanced version of the Prusa i3 MK3 with key upgrades such as an improved filament sensor for more reliable printing, a redesigned extruder assembly for easier maintenance, and reduced vibration for smoother operation. These advancements refine the user experience and print quality.
What size print is the Prusa i3?
The Prusa i3 MK3S+ offers a generous print size of 250×210×210 mm, or approximately 9.84×8.3×8.3 inches, accommodating a wide range of 3D printing projects with precision and reliability
How long will a Prusa last?
A Prusa 3D printer typically has a lifespan of 5-10 years with proper maintenance. Regular use and adherence to maintenance schedules can help ensure optimal performance and longevity, extending usage well beyond 800 print hours. Keep it clean and updated for the best results.


